O curso continuado de desenho Traço e Forma está de volta, em sua 3º edição, em 2026!
Estou feliz. Adoro dar aulas pois gosto de compartilhar o que aprendi, de falar de minhas experiências de desenho e de Arte em geral.
Vamos à descrição completa do curso:
TRAÇO E FORMA
O curso Traço e Forma foi concebido com a finalidade de proporcionar um acompanhamento contínuo aos participantes que almejam, mediante prática sistemática e orientada, o aprimoramento de suas capacidades artísticas e o desenvolvimento profissional. Além do conteúdo programático, o curso reúne exercícios, reflexões e experiências, resultantes de 15 anos de atuação no ensino de desenho e 30 anos de prática profissional.
FORMATO DO CURSO
- 01 aula por semana com duas horas de duração;
- ao vivo com o professor e on-line (via Zoom);
- 42 aulas previstas, divididas em 7 módulos com 6 aulas cada;
- assessoria no período entre aulas por WhatsApp;
- as aulas ficarão gravadas e disponíveis por 1 ano.
DIA E HORÁRIO
- Segundas-feiras, das 19h00 às 21h00
INÍCIO DAS AULAS
- 19 de janeiro de 2026
PREVISÃO DE CALENDÁRIO:
- Todas as segundas-feiras exceto: 16/02-13/07-20/07-31/08-07/09-12/10-02/11
Obs.: caso seja necessário algum cancelamento de aula, a aula a ser reposta será realizada no sábado seguinte, das 09:30 às 11:30;
CONTEÚDO
O curso TRAÇO e FORMA é estruturado em 7 módulos sequenciais, cada um contendo 6 aulas cuidadosamente planejadas. Abaixo estão os módulos que compõem o programa, acompanhados de uma breve descrição de seus conteúdos:
I. Leitura Bidimensional: O formato como fundamento indispensável
- Linha: percursos, direções e variações
- Reprodução de formatos irregulares, silhuetas e perfis
- Formato negativo e preenchimento a lápis
II. Plano e Objeto: Bases da construção tridimensional
- Plano em diferentes orientações
- Círculo e a elipse
- Construção básica dos sólidos e sombras de marcação
III. Volume e Materialidade: Da estrutura da forma ao volume
- Criação e desenvolvimento dos sólidos (cortes e rebaixos)
- Cubo, esfera e construção do valor tonal
- Sombreado, materialidade e texturas
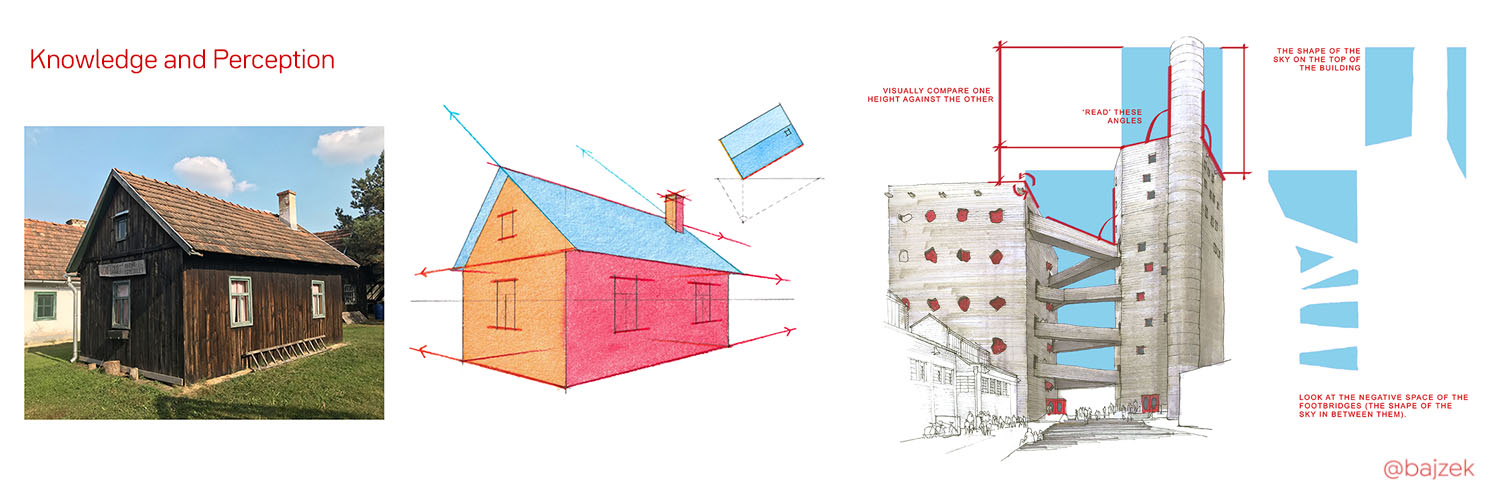
IV. Perspectiva de 1 Ponto: A criação do espaço
- Eixos de direção
- Conceitos gerais, construção e exercícios práticos
- Desenho de observação de um ambiente
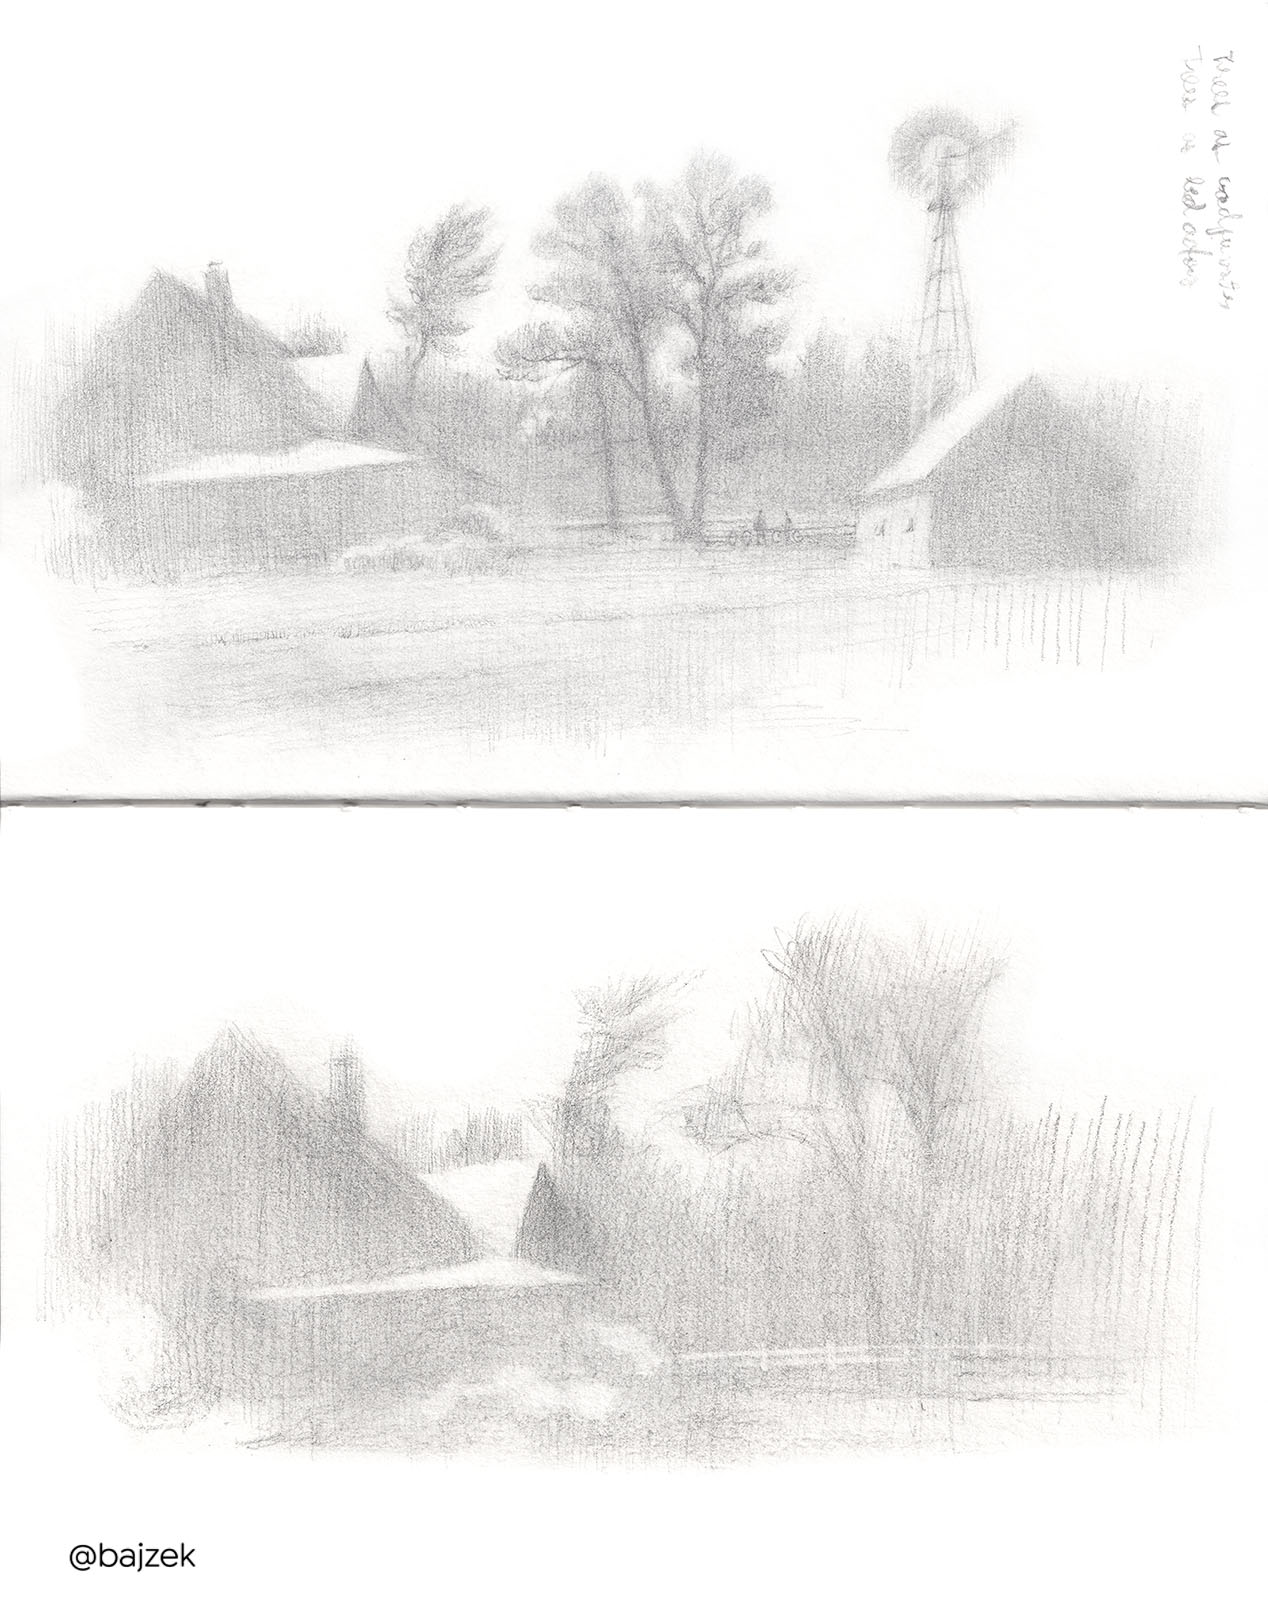
V. Perspectiva de 2 Pontos: Edificando a paisagem
- Conceitos gerais, construção e exercícios práticos
- Conceitos básicos de composição
- Desenho da paisagem: construção linear e tonal
VI. Desenho de Vegetação: A natureza como referência
- Variações de formato, borda e direção em arbustos e árvores
- Silhuetas e estrutura das árvores
- Elaboração por camadas de informação
VII. Desenhos Temáticos: Observação e retrato
- Abordagens de desenho: gestual, analítico, linear e massa da forma
- Desenho de observação de planta com vaso
- Desenho de retrato
Pré-requisitos:
Seguem abaixo os pré-requisitos para cada módulo. Caso o/a participante já tenha realizado algum curso comigo ou possua experiência prévia em desenho, poderá entrar em contato para uma avaliação individualizada.
- Módulo I: nenhum pré-requisito;
- Módulo II: ter cursado o módulo I;
- Módulo III: ter cursado os módulos anteriores;
- Módulo IV: ter cursado os módulos anteriores;
- Módulo V: ter cursado os módulos anteriores;
- Módulo VI: ter cursado o módulo I;
- Módulo VII: ter cursado o módulo I;
SOBRE OS MATERIAIS
A lista detalhada de materiais será fornecida na efetivação da matrícula.
TÉCNICAS ABORDADAS
Grafite e canetas markers tons de cinzas.
VALORES DOS MÓDULOS E PACOTES
Dica: Observe que quanto mais módulos você adquirir, menor o valor de cada aula ;)
A partir de 01º de janeiro de 2026
- 1 Módulo: R$ 780,00 (à vista ou em até 2x)
- Pacote com 2 Módulos: R$ 1.490,00 (5% de desconto à vista ou em até 2x)
- Pacote com 3 Módulos: R$ 2.190,00*(5% de desconto à vista ou em até 3x)
- Pacote com 5 Módulos: R$ 3.150,00*(5% de desconto à vista ou em até 5x)
- Curso completo (7 módulos): R$ 3.780,00 (10% de desconto à vista ou em até 7x)
* Valores válidos quando os módulos forem comprados simultaneamente;
IMPORTANTE: por se tratar de um curso contínuo, com aulas sequenciais ao longo do ano, não há reposição de aulas. Assim, caso você precise faltar, a aula será contabilizada normalmente dentro do módulo adquirido. Você, entretanto, terá acesso à aula gravada.
Até 31 de dezembro de 2025: 15% DE DESCONTO NO VALOR TOTAL DOS PLANOS*
* Para pagamento à vista realizado até 31/12/2025;
EFETIVAÇÃO DA INSCRIÇÃO:
Por favor entre em contato no e-mail edubajzek@gmail.com
IMPORTANTE: Os valores não serão devolvidos caso haja desistência.


.jpg)